Disable Phone Field #
Salesforce provides multiple options to capture contact numbers for customers. However, your business may not want to use all five contact numbers for sending SMS. As a result, there is a requirement to disable the ‘Home Phone’ field to prevent SMS messages from being sent to it.
Solution: #
Step 1: Accessing Configuration
- Log in to Salesforce.
- Go to the ValueText App.
- Navigate to the “Custom Phone Fields” tab.
- Click on the “New” button.
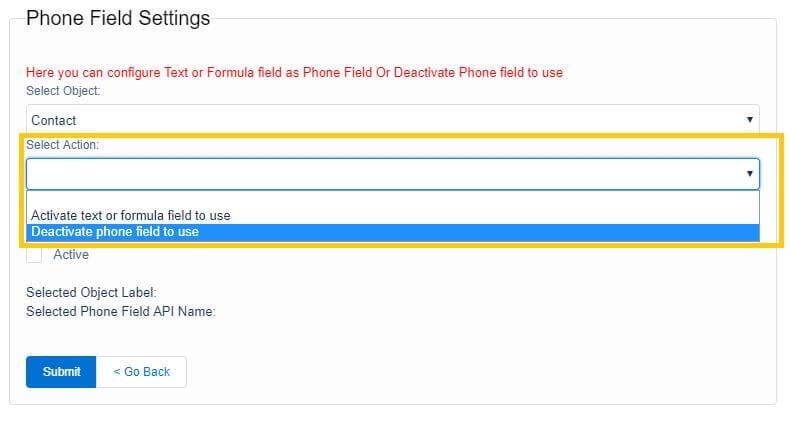
Step 2: Select Object and Action
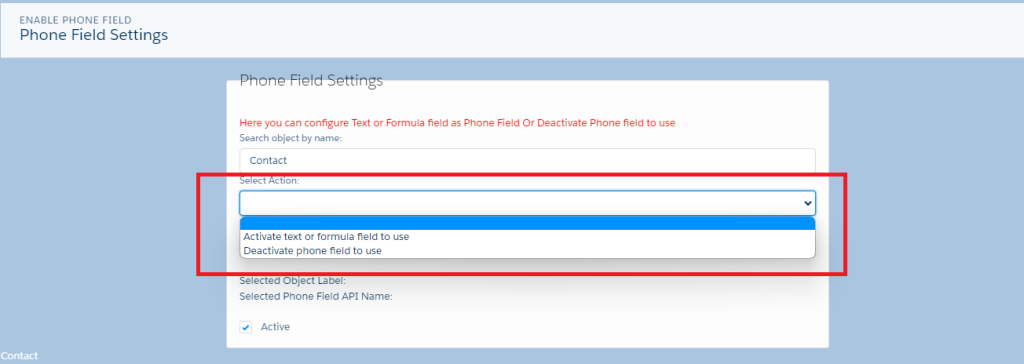
- Select the desired object where you want to disable the field.
- Choose the action “Deactivate phone field to use” from the dropdown menu.
Step 3: Select the Field to Disable
- Identify and select the ‘Home Phone’ field from the available phone fields.
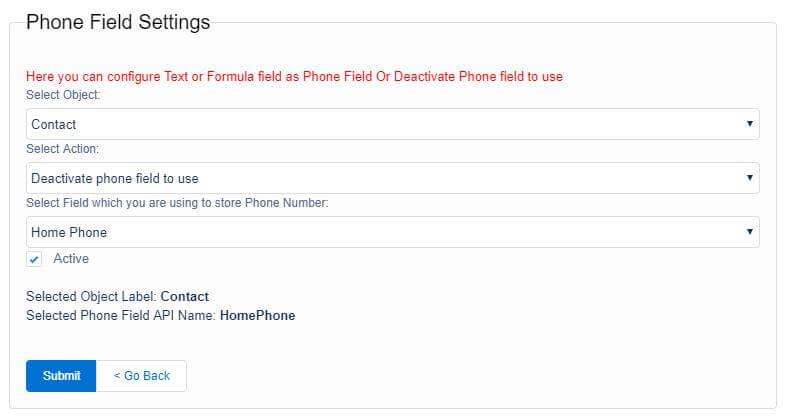
Step 4: Submit the Configuration
1. Ensure the ‘Active’ checkbox is selected.
2. Click on the submit button to save the configuration.
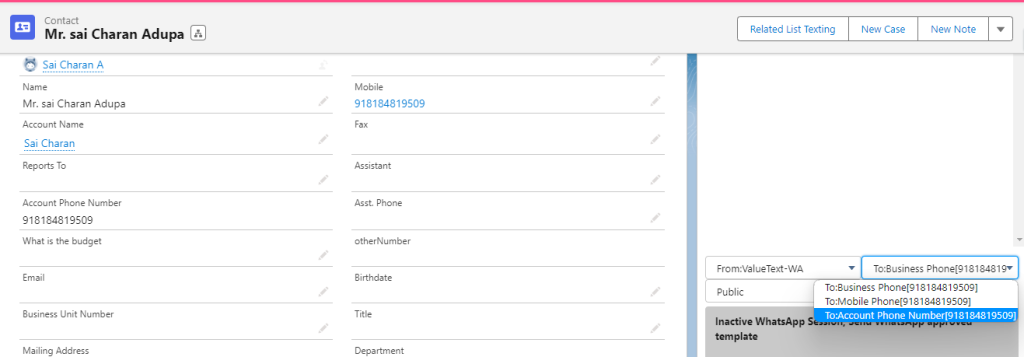
Result: After completing the above steps, go to a contact record in the Chat Console. You will notice that the ‘Home Phone’ field no longer appears in the phone field selection for the chat console.
Limitation: This disable phone field functionality does not apply to SMS messages sent from Workflow or Process Builder.
Activating Formula Field as Phone Field #
Requirement: Your business wants to add the ‘Account Phone Number’ field for sending SMS messages.
Solution: #
Step 1: Accessing Configuration
- Log in to Salesforce.
- Go to the ValueText App.
- Navigate to the “Custom Phone Fields” tab.
- Click on the “New” button.
Step 2: Select Object and Action
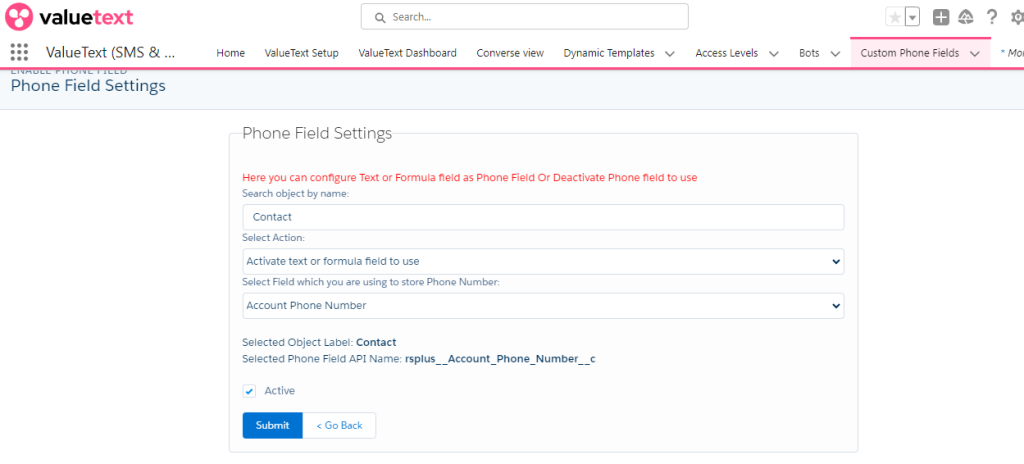
- Select the desired object where you want to enable the field (e.g., Contact).
- Choose the action “Active text or formula field to use” from the dropdown menu.
Step 3: Select the Field to Enable
- Identify and select the ‘Account Phone Number’ field from the available phone fields.
Step 4: Submit the Configuration
1. Ensure the ‘Active’ checkbox is selected.
2. Click on the submit button to save the configuration.
Result: After completing the above steps, go to a contact record in the Chat Console. You will notice that the ‘Account Phone Number’ field now appears in the phone field selection for the chat console.
Use of “Active text or formula field to use”
To display a text or formula field that holds a phone number in the chat console, follow the same steps as above but choose the action “Active text or formula field to use” in the configuration process.

