
Now we can send custom notifications in two ways
- Using Flows
- Using our ValueText by just enabling option
Using our ValueText by Just enabling option.
Note:- To enable this , The ValueText package version should greater than 1.298 , (Click here for the latest package)
Navigation: Go to “ValueText Setup” tab >>> In step 1 we need to enable one check box named as “Enable salesforce custom notifications” >>> For reference see the below image.

Using Flow (old process, if you are using old package):
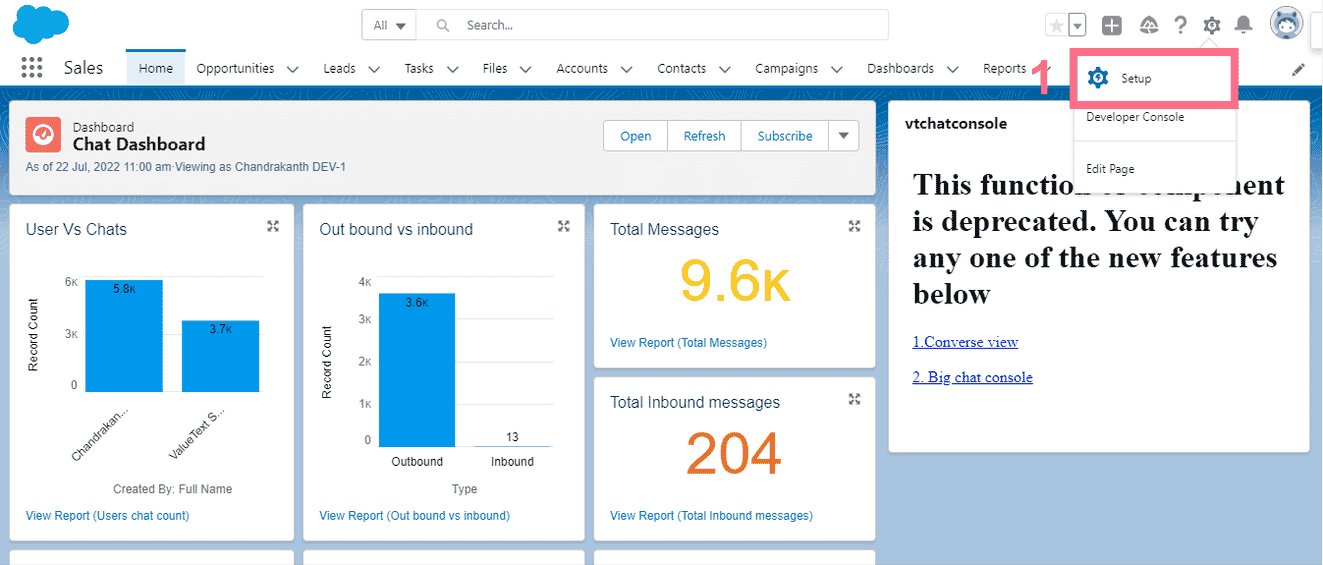
Step1: To set up your Mobile Notifications for Inbound Messages, open Salesforce and click “Setup” [1] from the gear icon.
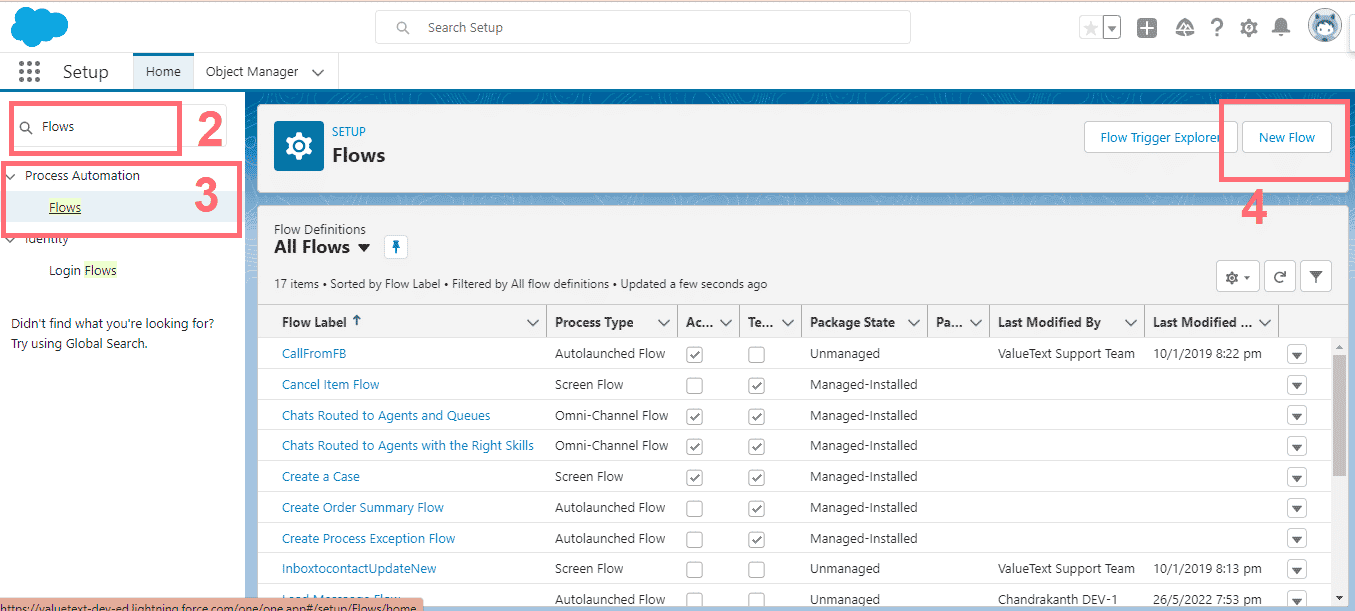
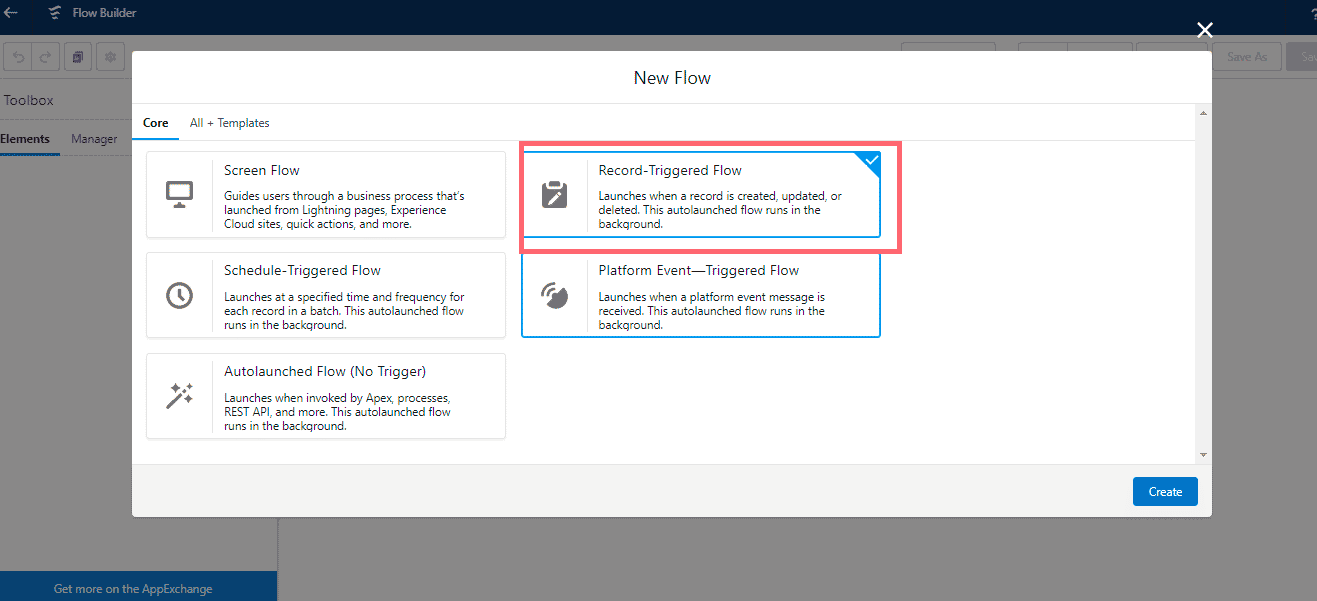
Step3: After clicking on New Flow, Pop Up should open for you to choose the Flow type and the record triggered flow, then click “Create.”
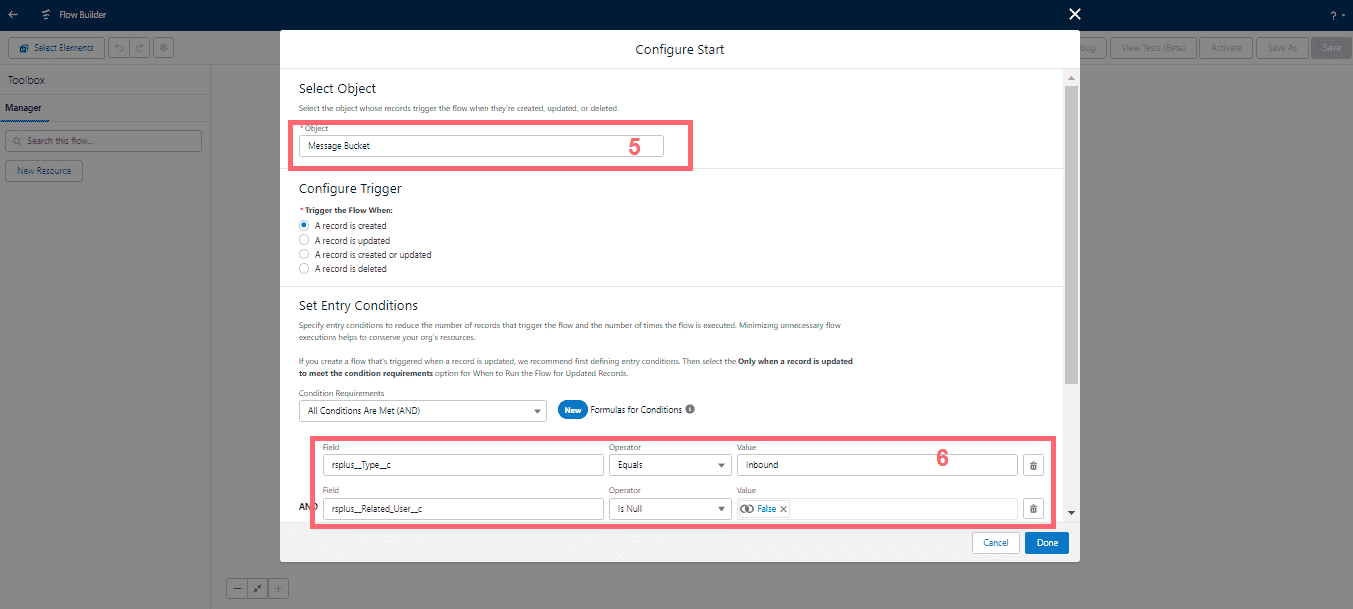
Step4: To configure the trigger, choose an object and filter the conditions
1. Choose “Message Bucket” Object [5]
2. For the trigger, choose “A record is created.”
to set the entry conditions
3. Type – equal to ‘Inbound’ [6]
4. Related user – not equal null [6]
Click Done.
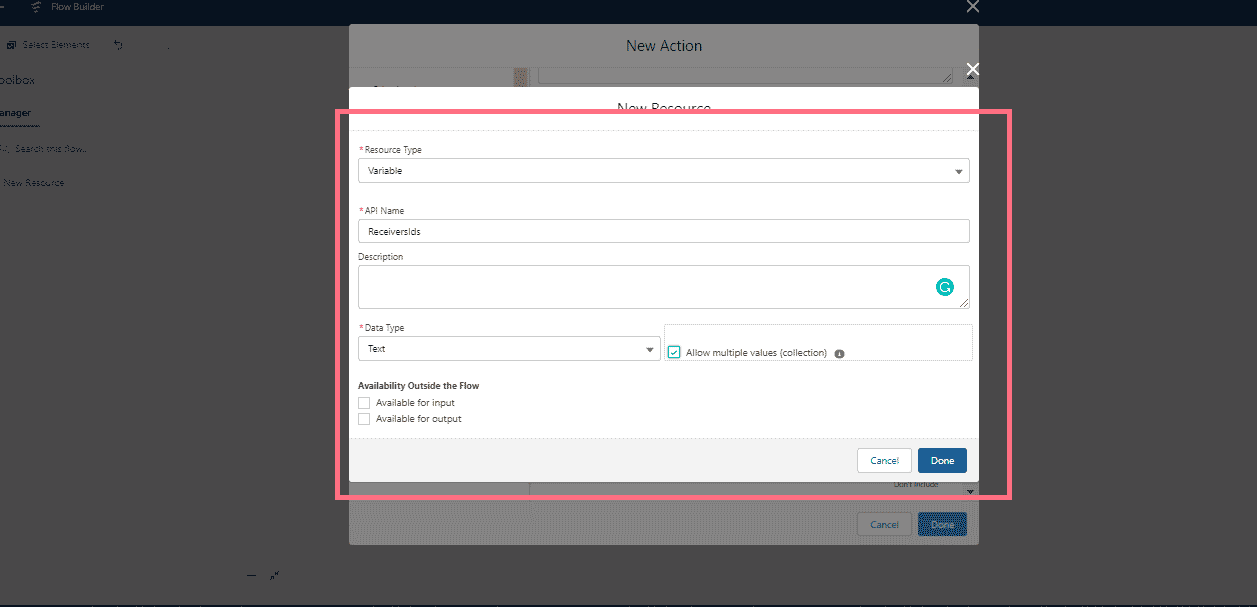
Step5: Create a new resource with collection type as shown below.
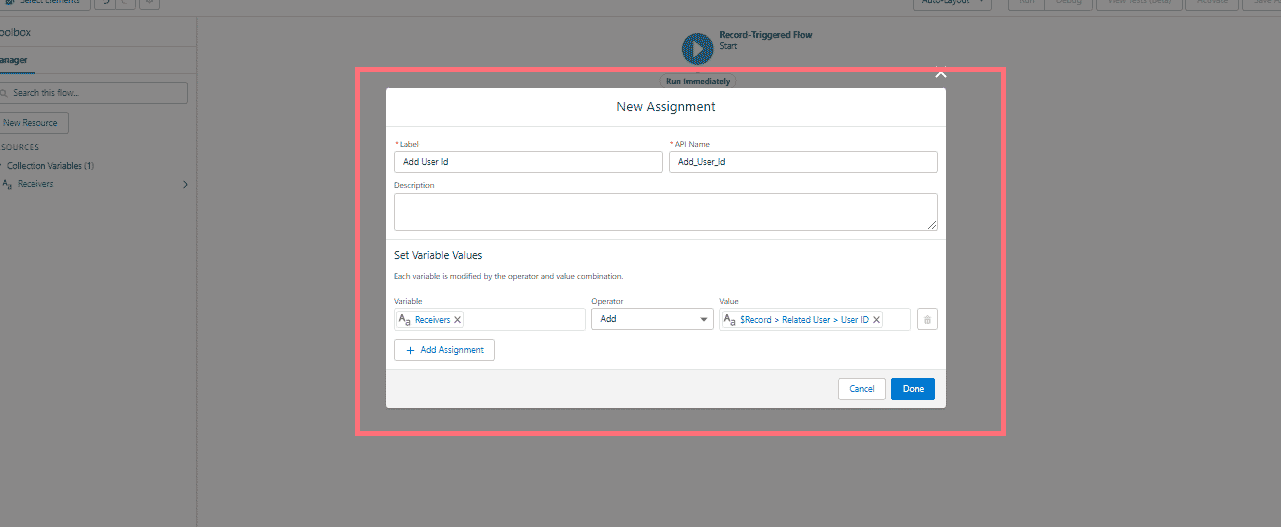
Step6: Next, add the element of Assignment to add the record-related user to the resource variable.
Step7: Add the element of Action, and choose custom notifications.
https://help.salesforce.com/s/articleView?id=sf.notif_builder_considerations.htm&type=5Create Custom Notification in Salesforce
Step1: Create new notification in salesforce.
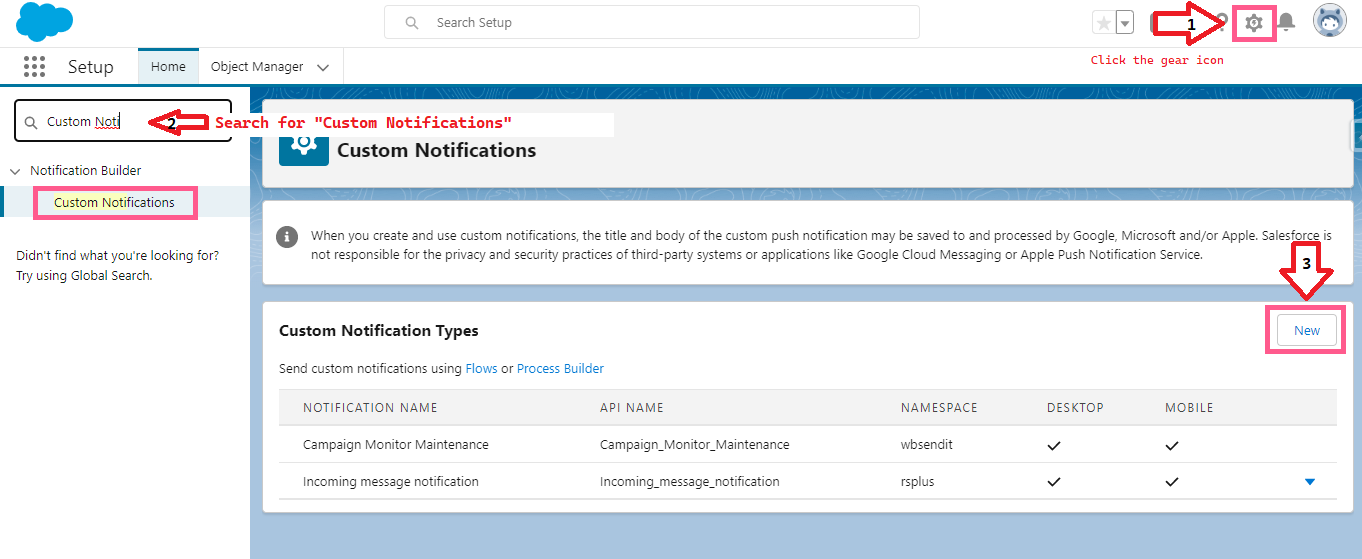
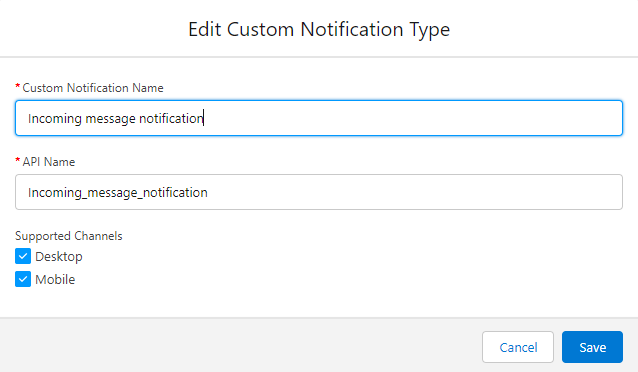
Step2: Click new and Create one “Custom Notification Type” like below >>> Click Save
Step3: Open Developer console and query the below Statement.
Note: In case you changed the name in above image please use the same name in below statement also or if you already created one custom notification use that name in below statement
SELECT id, MasterLabel FROM CustomNotificationType WHERE MasterLabel = ‘Incoming message notification’

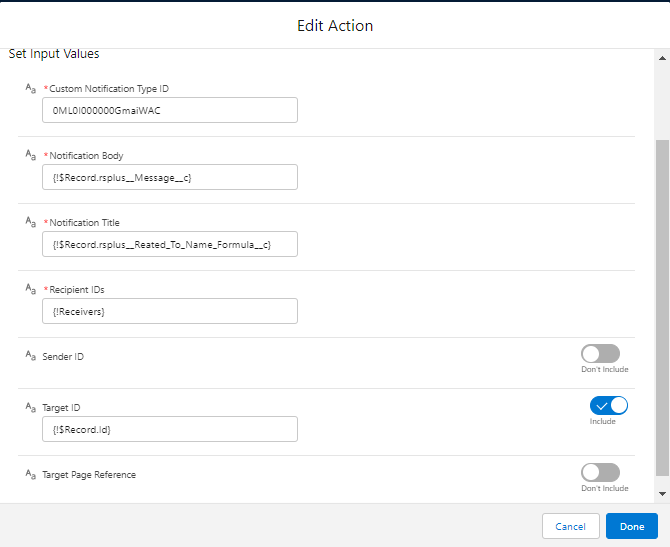
Now set the input values to flow action.
- Custom notification type ID. = “Paste the above copied Id ‘0ML0I000000GmaiWAC'”
- Notification Body – Choose a message from the record
- Notification Title – Choose “rsplus__Reated_To_Name_Formula__c” from the record.
- Recipient IDs – Choose resource variable.
- Target ID – Give the record Id
See the below image for the reference:
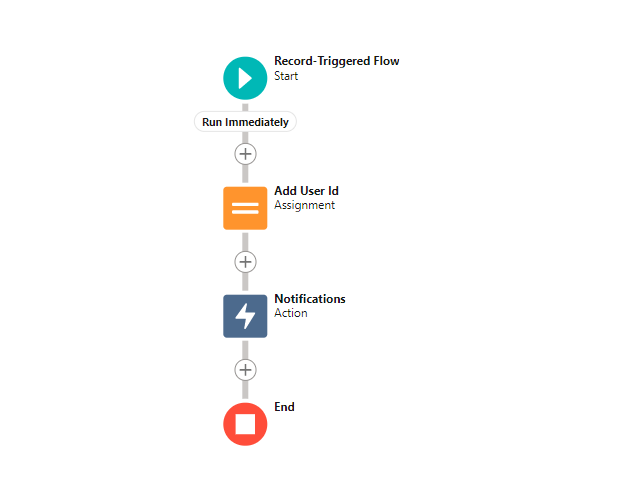
The final flow looks like below.
Notes on Custom notification:
You can create up to 500 custom notification types.
Each notification can have up to 10,000 users as recipients. However, you can add an action to the same process within Process Builder or to the same flow in Flow Builder to have more recipients.
Your org saves your most recent 1 million custom notifications for view in notification trays. Your org can save up to 1.2 million custom notifications, but it trims the amount to the most recent 1 million notifications when you reach the 1.2 million limits.
An org can execute up to 10,000 notification actions per hour. When you exceed this limit, no more notifications are sent in that hour, and all unsent notifications are lost. Notification actions resume in the next hour. For example, your notification action processes are triggered 10,250 times between 4:00 and 5:00. Salesforce executes the first 10,000 of those actions. The remaining 250 notifications aren’t sent and are lost. Salesforce begins executing notification actions again at 5:01.
Custom notification title and body fields support plain text only.
Site Link : https://help.salesforce.com/s/articleView?id=sf.notif_builder_considerations.htm&type=5