
Configure ValueText in Zoho CRM
After setup, five things to configure: the Sender IDs your organization sends from, Access Levels that control who sees which senders and templates, Dynamic Templates, WhatsApp template approval, and Custom Phone Fields.
Last updated 9 Sep 2026Sender IDs
Sender IDs are the numbers your organization sends from.
Creating or editing a Sender ID
- Open the Sender IDs module.
- Click Create (or open an existing record to edit).
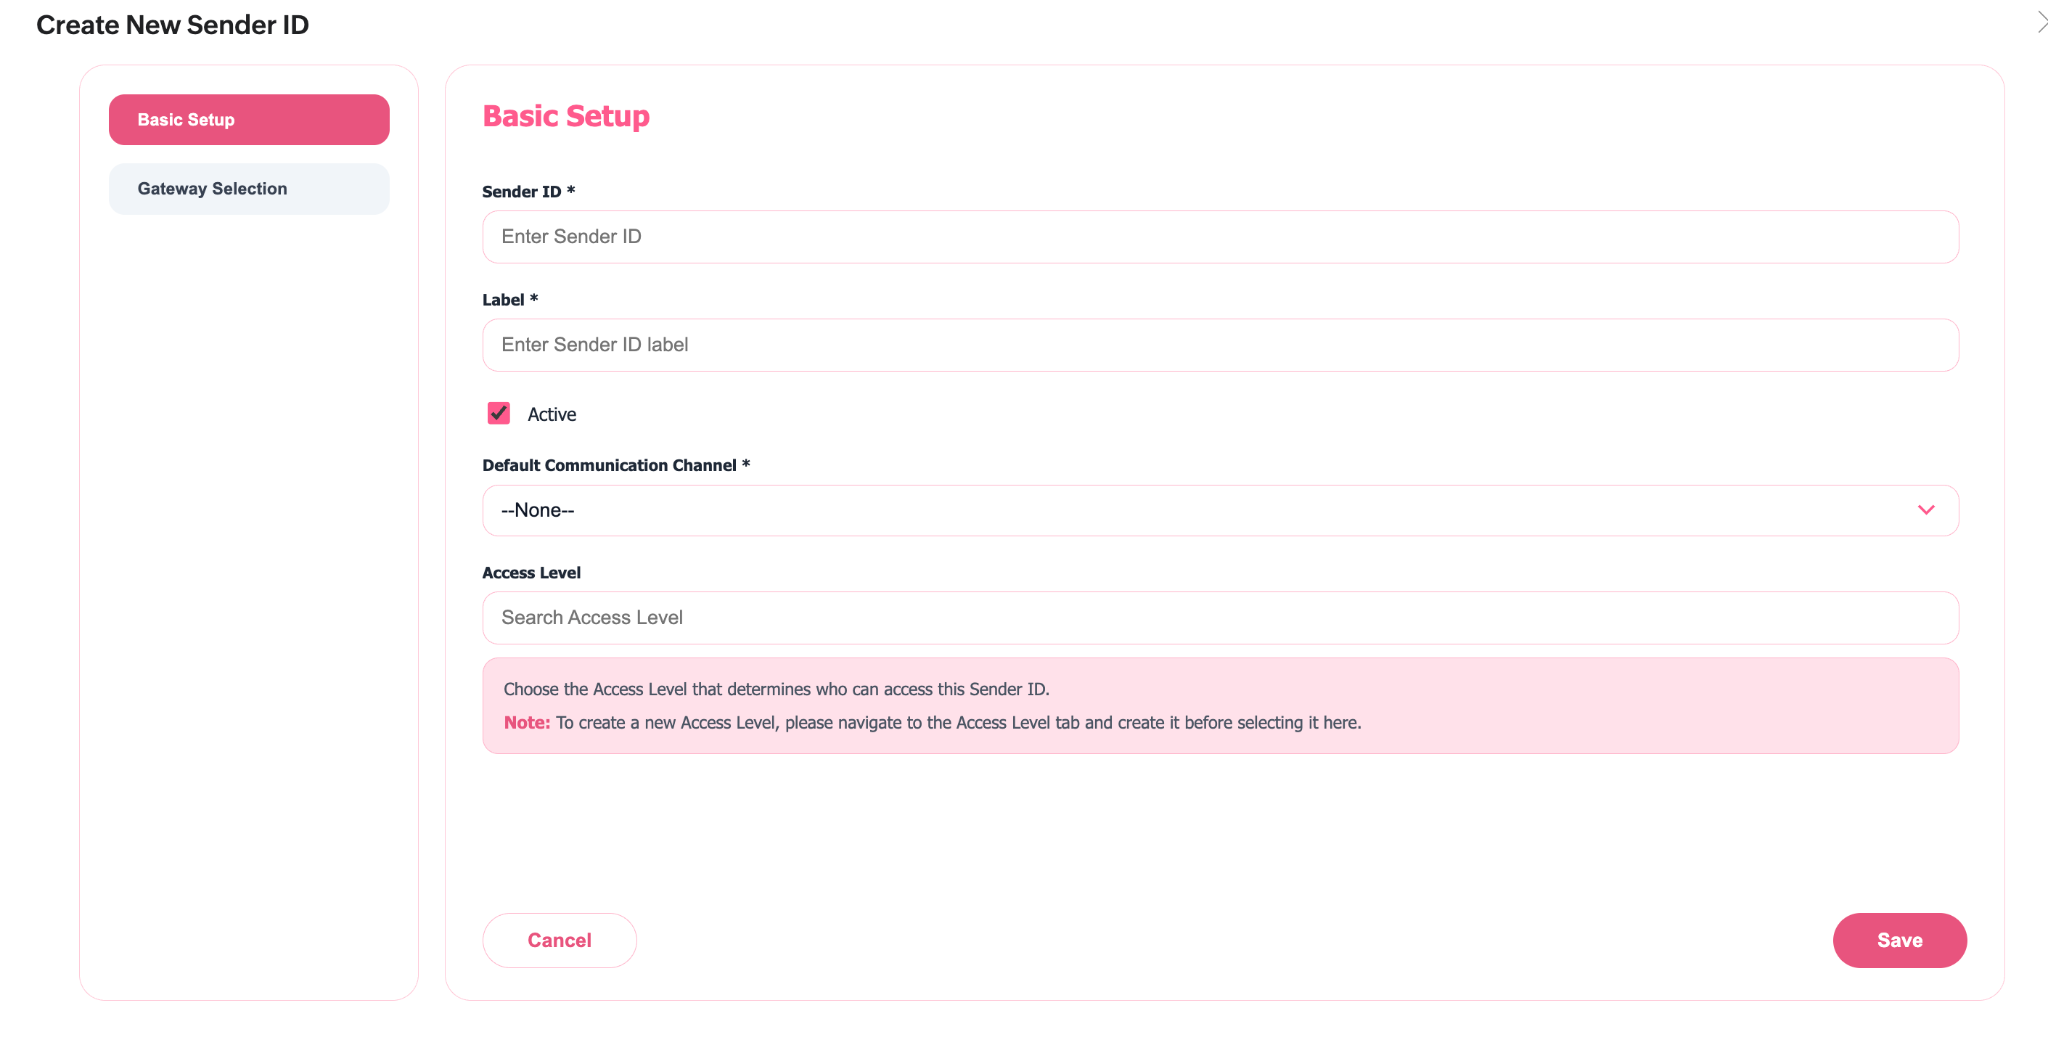
- Complete the fields:
- Click Save.
Tip: Set a Label on every sender. Without it the From dropdown shows the raw number, which is harder for users to identify at a glance.
Access Levels
Access Levels are folders that control which users can see which sender IDs and templates. A sender or template with no Access Level assigned is visible to everyone.
Creating an Access Level
- Navigate to the Access Levels module.
- Click Create.
- Enter a Name, this appears as the folder name.
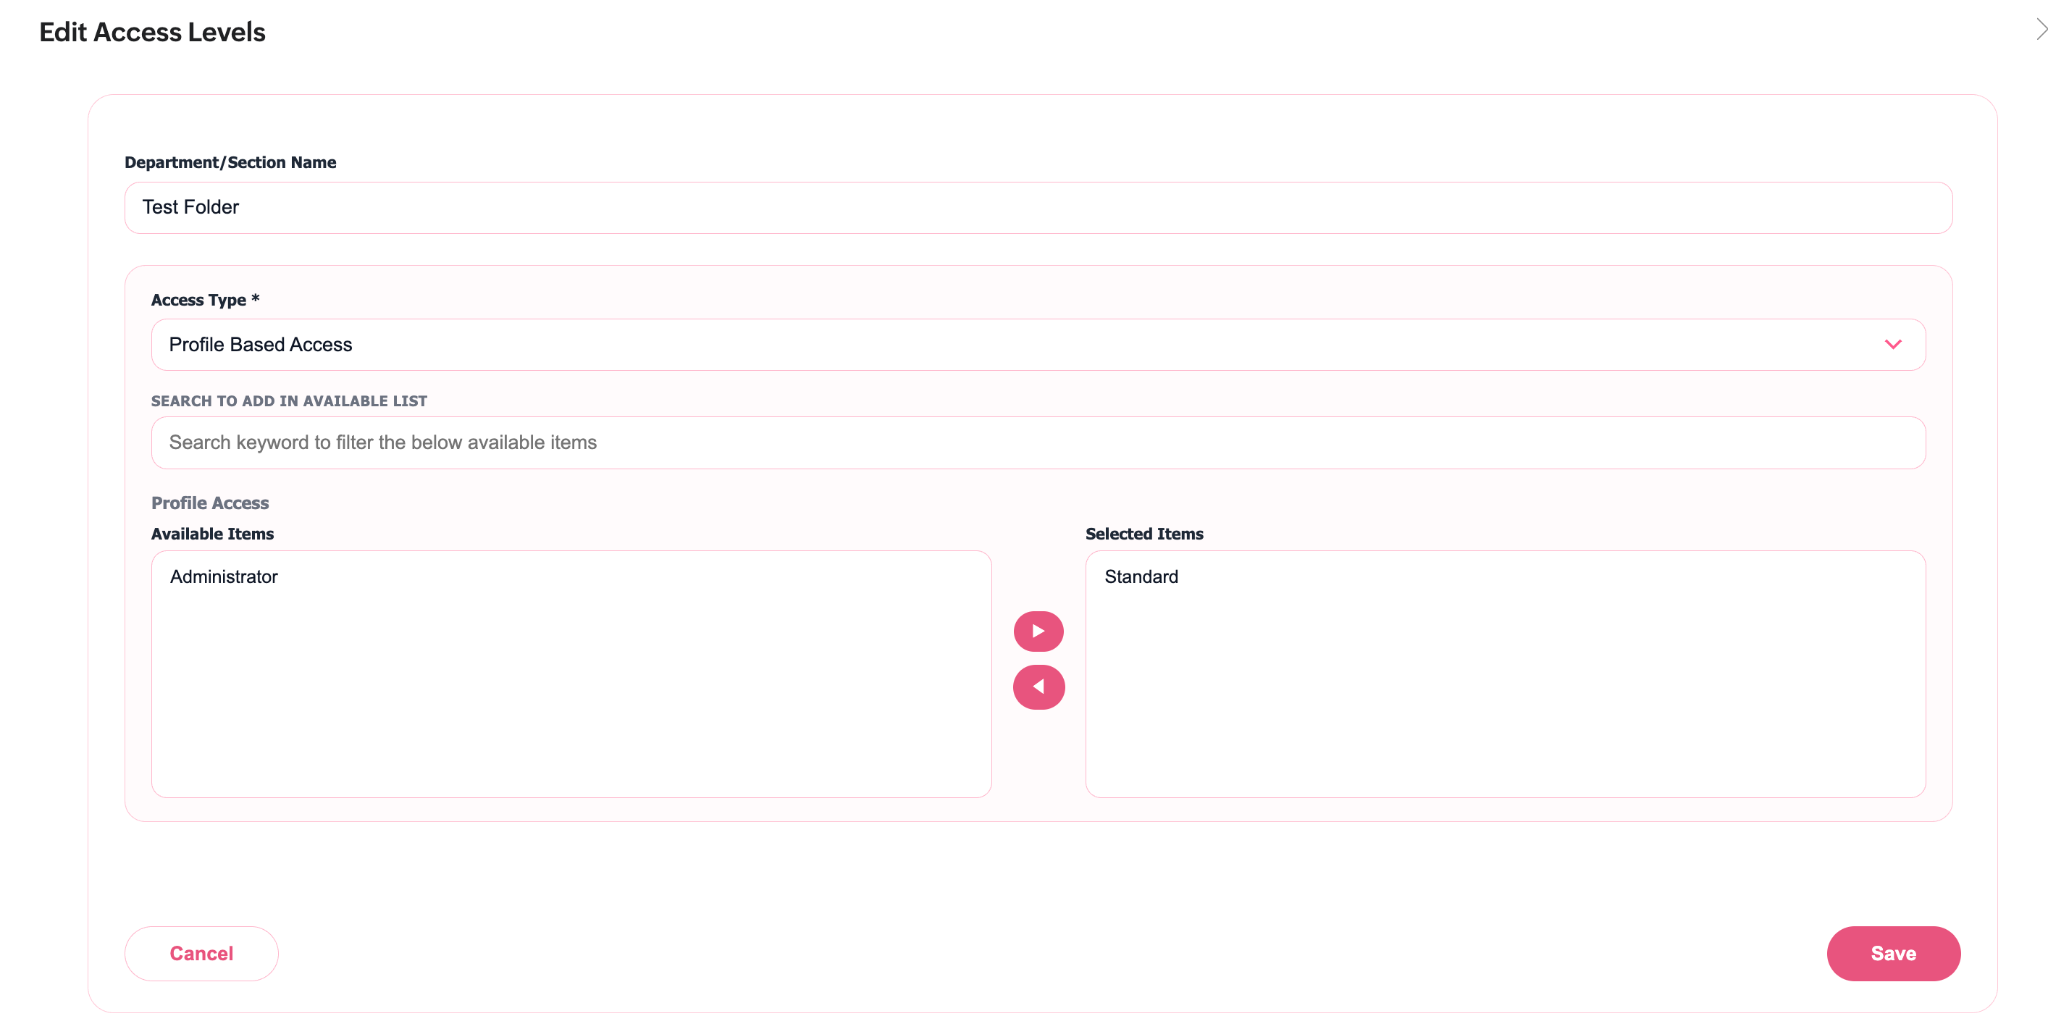
- Select an Access Type: Populate Access Profiles or Access User as required.
- Click Save.
Assigning an Access Level
- To a template: open the Dynamic Template record and set its Access Level field.
- To a sender ID: open the Sender ID record and set its Access Level field.
Templates with no Access Level appear in the Public folder in the template picker, visible to all users.
Example
| Goal | Configuration |
|---|---|
| Sales team only sees sales templates | Access Level "Sales Templates", Access Type = Profile Based Access, Access Profiles = Sales |
| Two named managers can use the escalation number | Access Level "Escalations", Access Type = Multiple User Access, Access User = both managers; assign to the Sender ID |
| Everyone can use a template | Leave Access Level blank |
Dynamic Templates
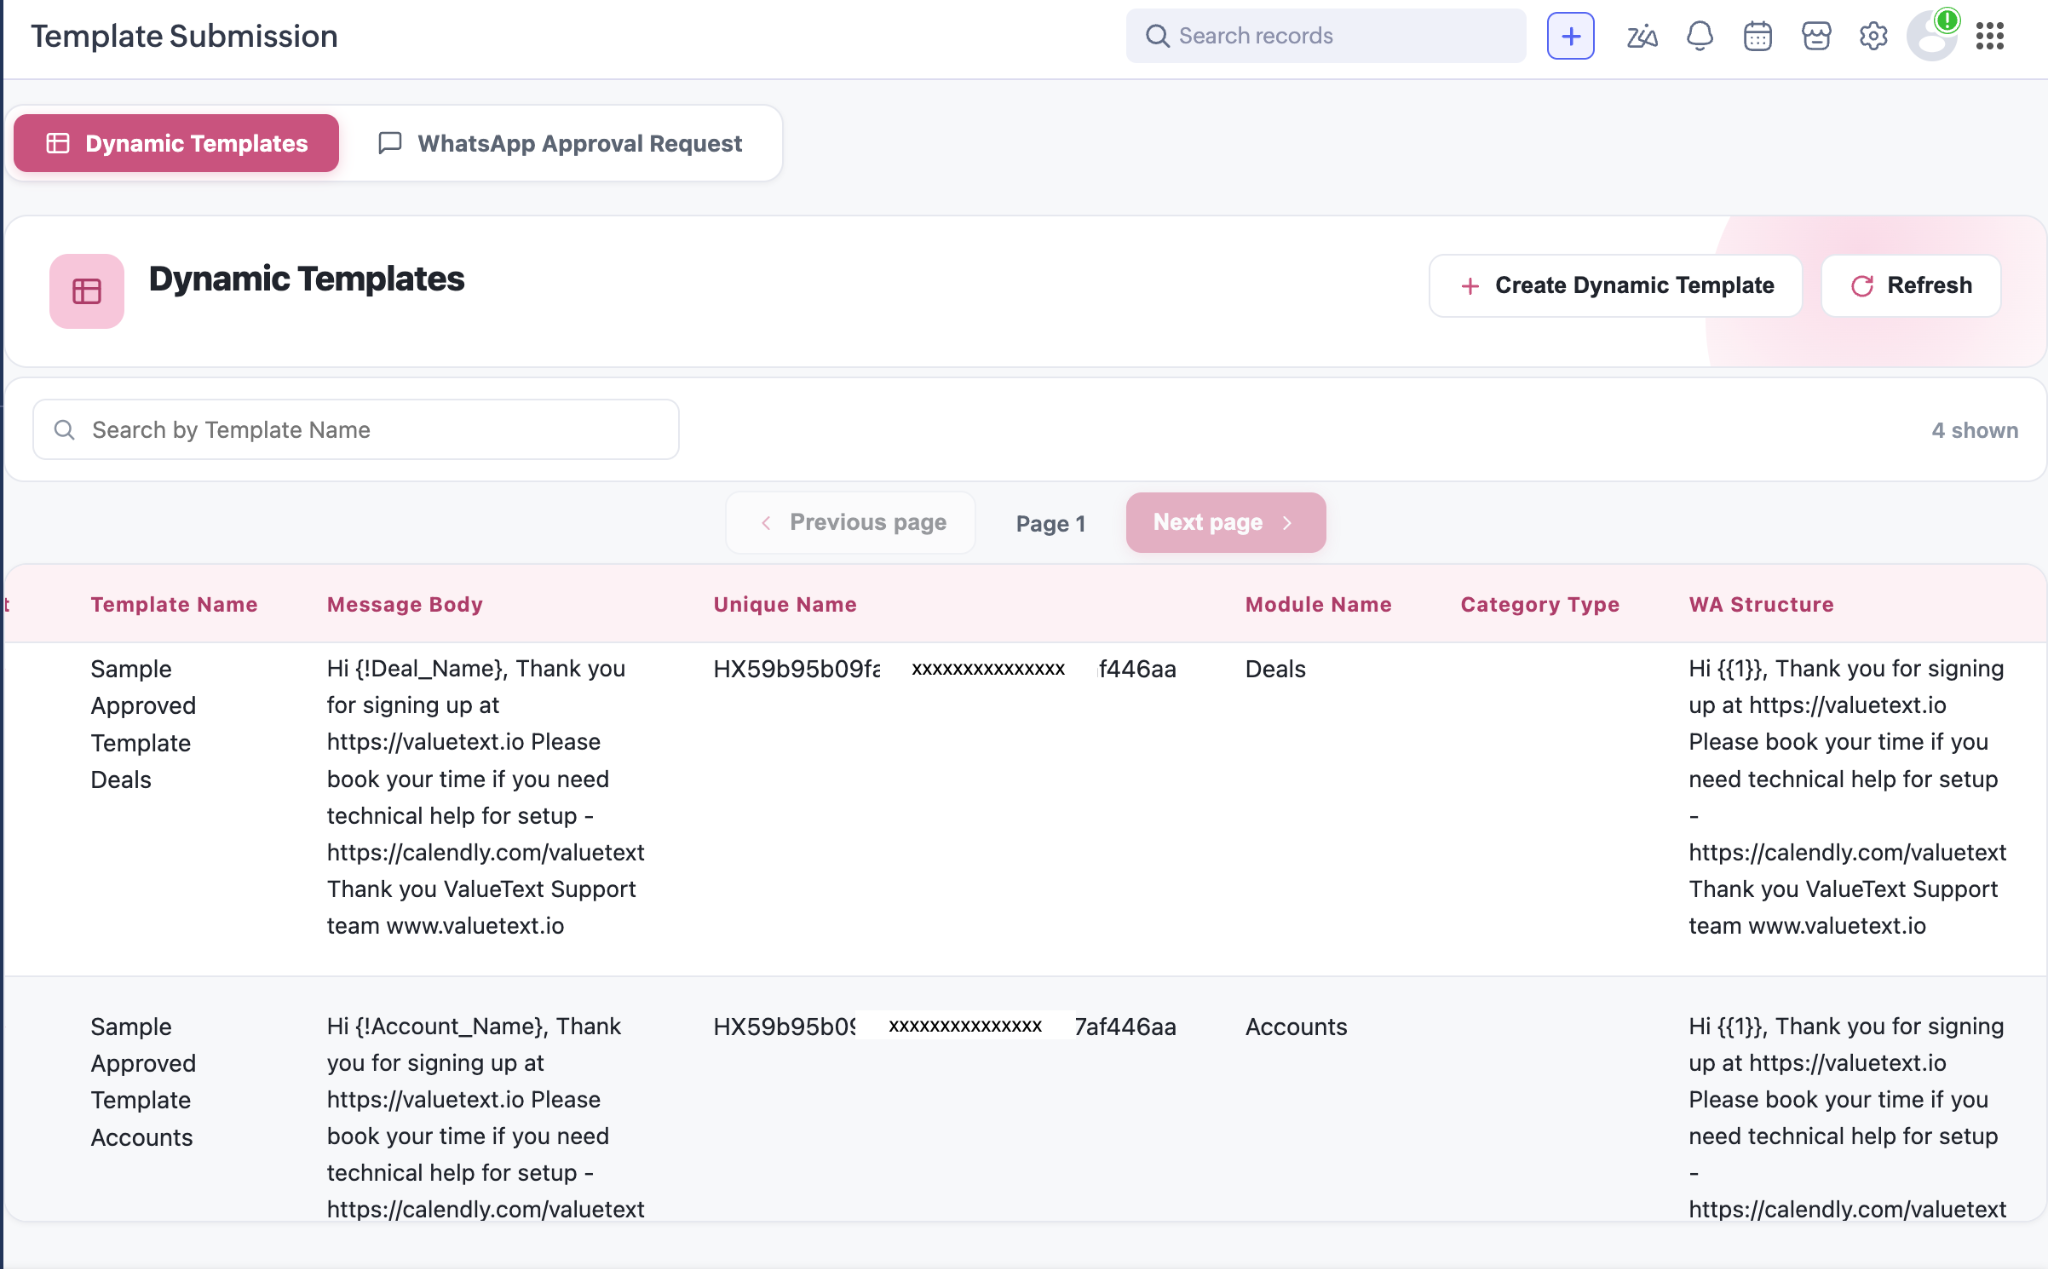
Templates let you send standardized messages quickly, with values merged live from the CRM record. Templates can be managed from the Template Submission tab or directly in the Dynamic Templates module.
Viewing templates
- Click the Template Submission tab.
- The Dynamic Templates view lists all templates with their Template Name, Message Body, Unique Name, Module Name, Category Type and WA Structure.
- Use Search by Template Name to filter, and the pagination controls to move between pages.
- Click Refresh to reload the list after making changes.
Creating a template
- From the Template Submission tab, click Create Dynamic Template.
- Complete the fields as shown below.
- Click Save.
WhatsApp template approval
WhatsApp requires every template to be approved by Meta before it can be used to start a conversation. The Template Submission tab lets you submit templates for approval without leaving CRM.
Submitting a template for approval
- Click the Template Submission tab.
- Select the WhatsApp Approval Request view.
- Click to create a new approval request.
After approval
Once Meta approves the template, the approved template's identifier is stored in WA Template Unique Name on the Dynamic Template record, shown in the Unique Name column of the template list. The template is then available in the chat console for WhatsApp sends.
Note: Approval times are set by Meta and typically range from a few minutes to 24 hours. Templates rejected by Meta must be edited and resubmitted.
Custom Phone Fields
By default, the To dropdown in the chat console lists every phone-type field on the record. Custom Phone Fields let you add text fields that hold phone numbers, or hide phone fields you do not want used.
Add a custom phone field
- Navigate to the Custom Phone Fields module.
- Click Create.
- Complete the fields:
- Click Save.